Affiliate Disclosure: As an Amazon Associate, we earn from qualifying purchases at no extra cost to you. Our medical-first reviews and posture guides rely on physical biomechanical laboratory testing to eradicate remote workplace injuries.
You sit down at your desk at 9 AM, feeling completely fine. By 11 AM, there it is—a dull, hot, nagging ache radiating right across your lower lumbar spine. By 3 PM, you are constantly shifting, leaning on one elbow, or slouching forward, desperate for a few seconds of relief. If this sounds like your daily routine, you are trapped in a destructive cycle of spinal compression.
The mistake most remote workers make is trying to “force” themselves to sit perfectly straight using raw willpower. Slouching is not a character flaw; it is a mechanical failure of your workspace layout. When you slouch, your pelvis rolls backward into a posterior tilt, causing your intervertebral discs (specifically the L4/L5 and L5/S1 segments) to endure a crushing load of up to 190% compared to standing. Learning how to fix lower back pain while sitting requires deploying concrete skeletal leverage to unweight your spine naturally.
🛑 The Golden Rule of Workspace Health No amount of posture correction can save your back if your chair’s foam is sagging or its backrest is static. If your equipment doesn’t actively support your lumbar curve, your stabilizing muscles will eventually spasm. Stop the fatigue and read our lab-tested buyers guide: The Best Ergonomic Office Chairs for Back Pain Relief.
5 Biomechanical Steps: How to Fix Lower Back Pain While Sitting
To systematically eradicate desk-induced strains and secure permanent lumbar spine relief at desk interfaces, implement these 5 physical recalibrations:
Step 1: Execute the Tailbone Flush (Anchor Your Pelvis)
Your lower back pain doesn’t actually start in your back; it begins at your hips. Most office workers leave a hollow 2-to-3 inch gap between their lower back and the chair frame. This gap forces the pelvis to tilt backward, flattening the spine’s natural lordotic S-curve. To fix this, stand up, bend slightly at the waist, slide your hips all the way back until your tailbone is completely flushed against the rear backrest frame, and sit upright. This establishes an anterior pelvic tilt, creating a stable, locked foundation for correct sitting posture for lower back pain management.
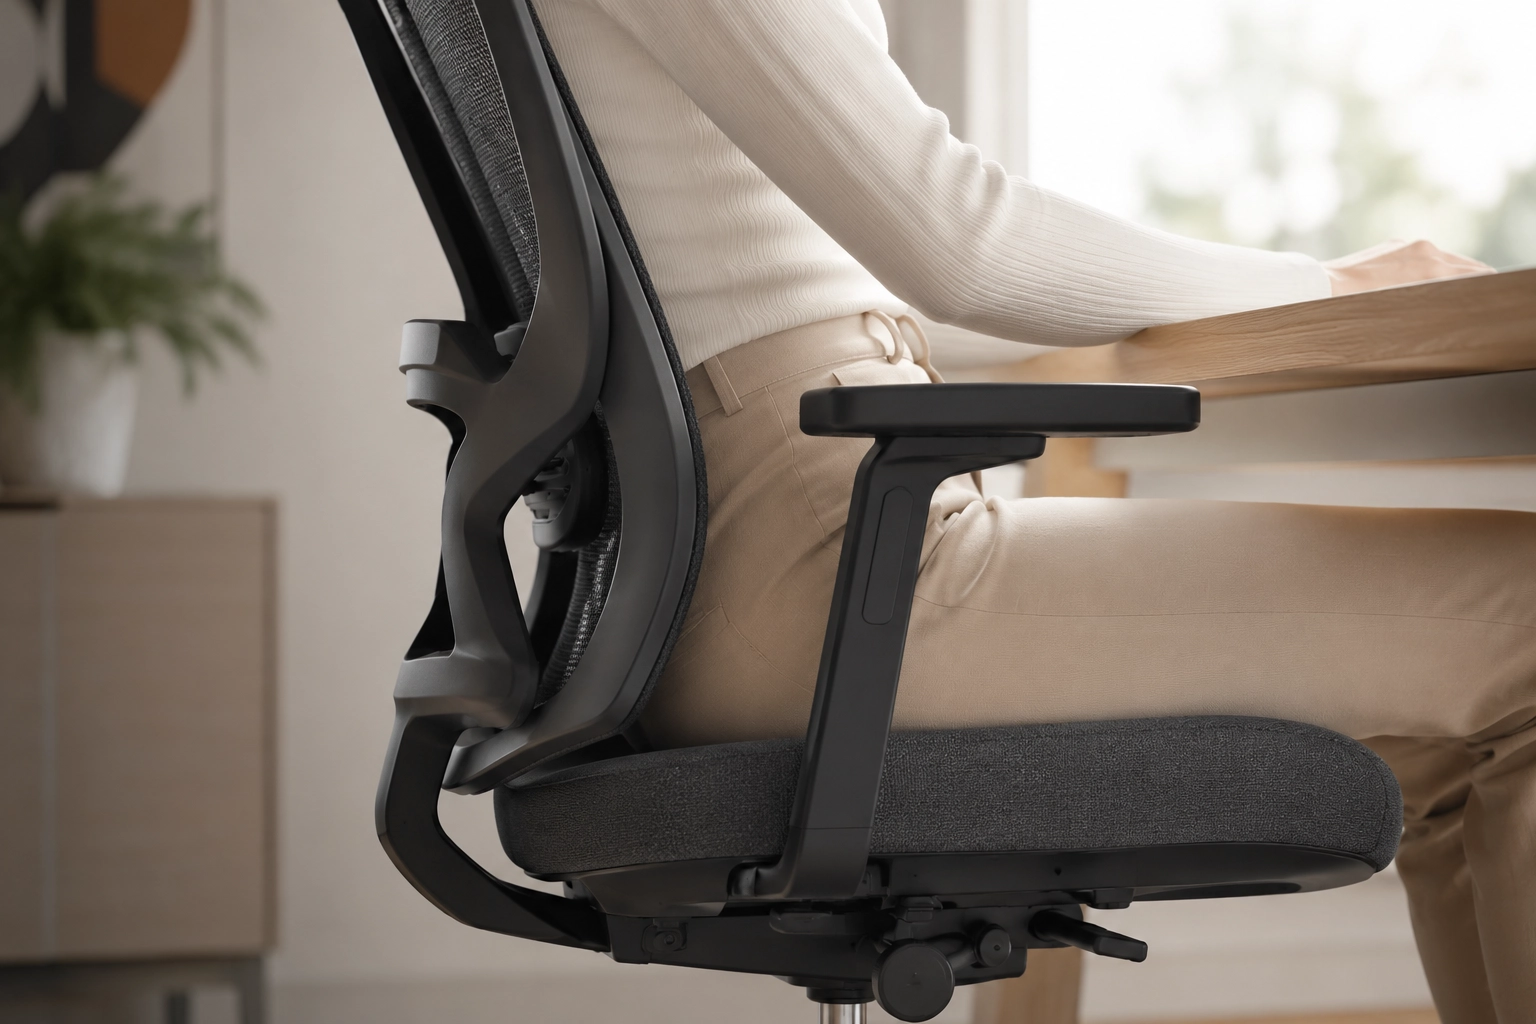 Pelvic Anchoring: Eliminating the rear gap restores the natural lordotic curve of the spine instantly. (Photo: ErgoSetupPro)
Step 2: Align the Lumbar Support Apex to the Beltline
Having a chair with lumbar support is useless if it is positioned incorrectly. Most people leave their lumbar support piece resting too low, pushing harshly against their sacrum and tailbone. The apex—the most prominent, protruding curved point of your chair’s lumbar support—must slide upward until it fits perfectly into the small of your lower back, roughly level with your beltline. This structural brace counteracts gravity, absorbing the upper body mass to effectively prevent back pain while working long hours.
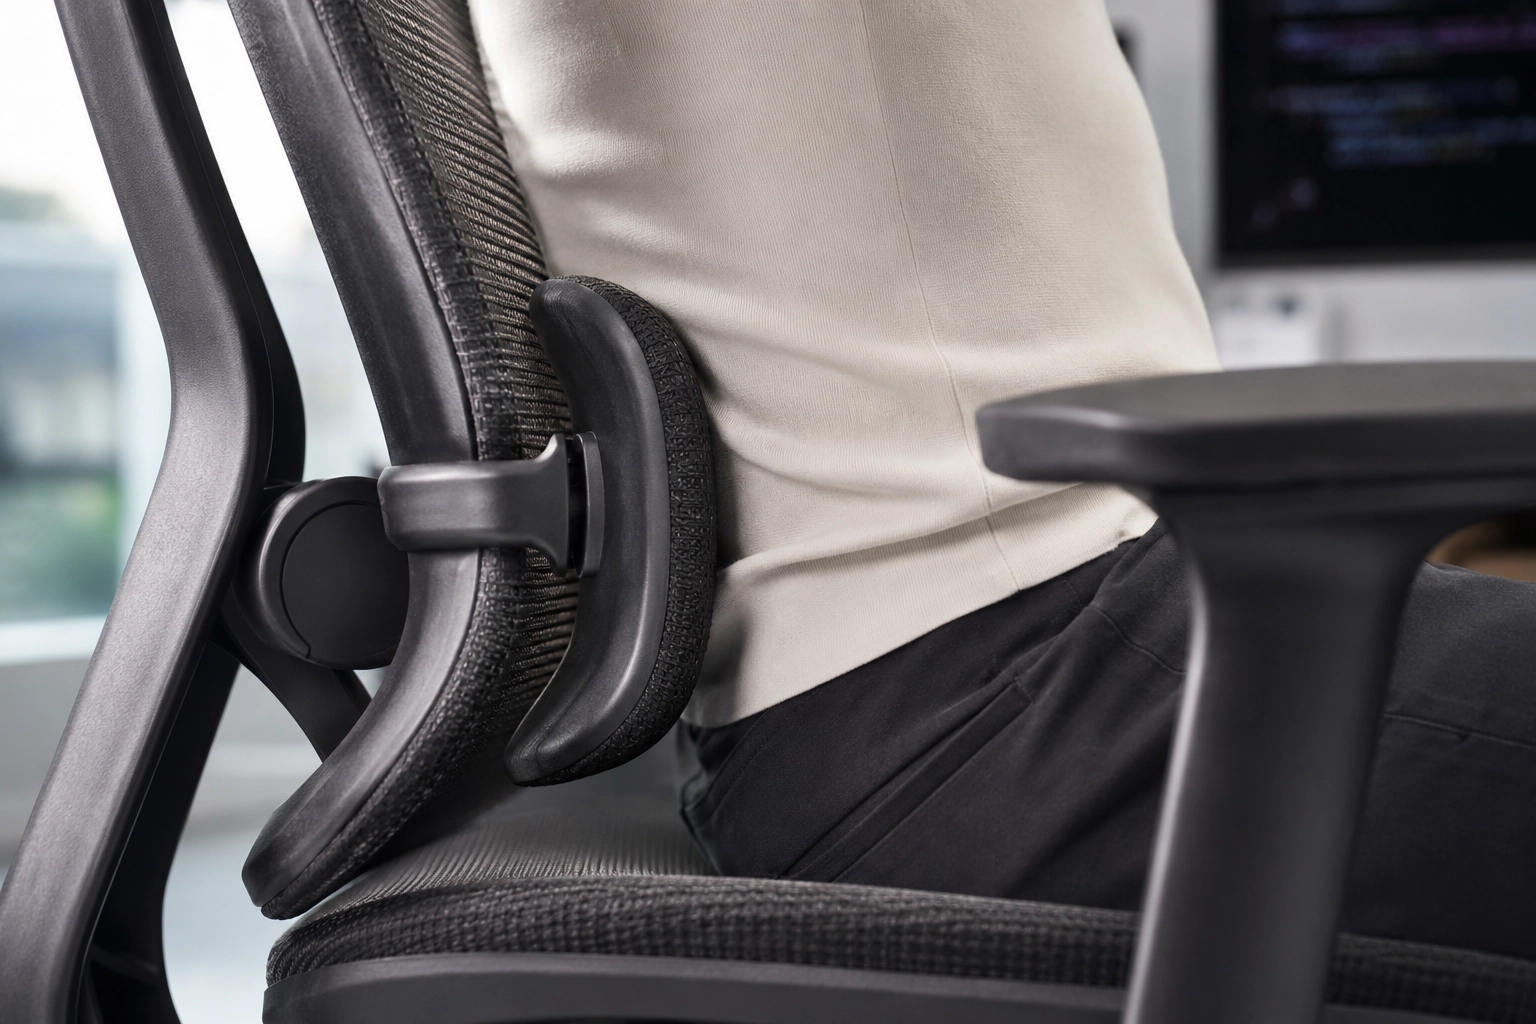 Apex Mapping: The curved brace must firmly seat into the lumbar curve, not the tailbone. (Photo: ErgoSetupPro)
Step 3: Enforce the Open-Angle 90-90-100 Rule
Sitting at a rigid, perfectly vertical 90-degree angle is an outdated architectural myth that maximizes intradiscal pressure. To achieve optimal ergonomic sitting positions, calibrate your desk joints using these three angles:
- The Elbows (90°): Rest relaxed flat on your armrests, completely flush with your keyboard height to relieve upper shoulder tension.
- The Feet (90°): Planted 100% flat on the floor. If your heels hover, it drags your pelvis out of alignment, creating severe muscle strain. If needed, deploy an under-desk footrest for immediate sciatica relief at desk terminals.
- The Hips (100°-110°): Recline the backrest slightly backward. A gentle 105-to-110 degree recline transfers a massive chunk of your torso weight directly into the chair’s backrest fabric instead of crushing your lumbar vertebrae.
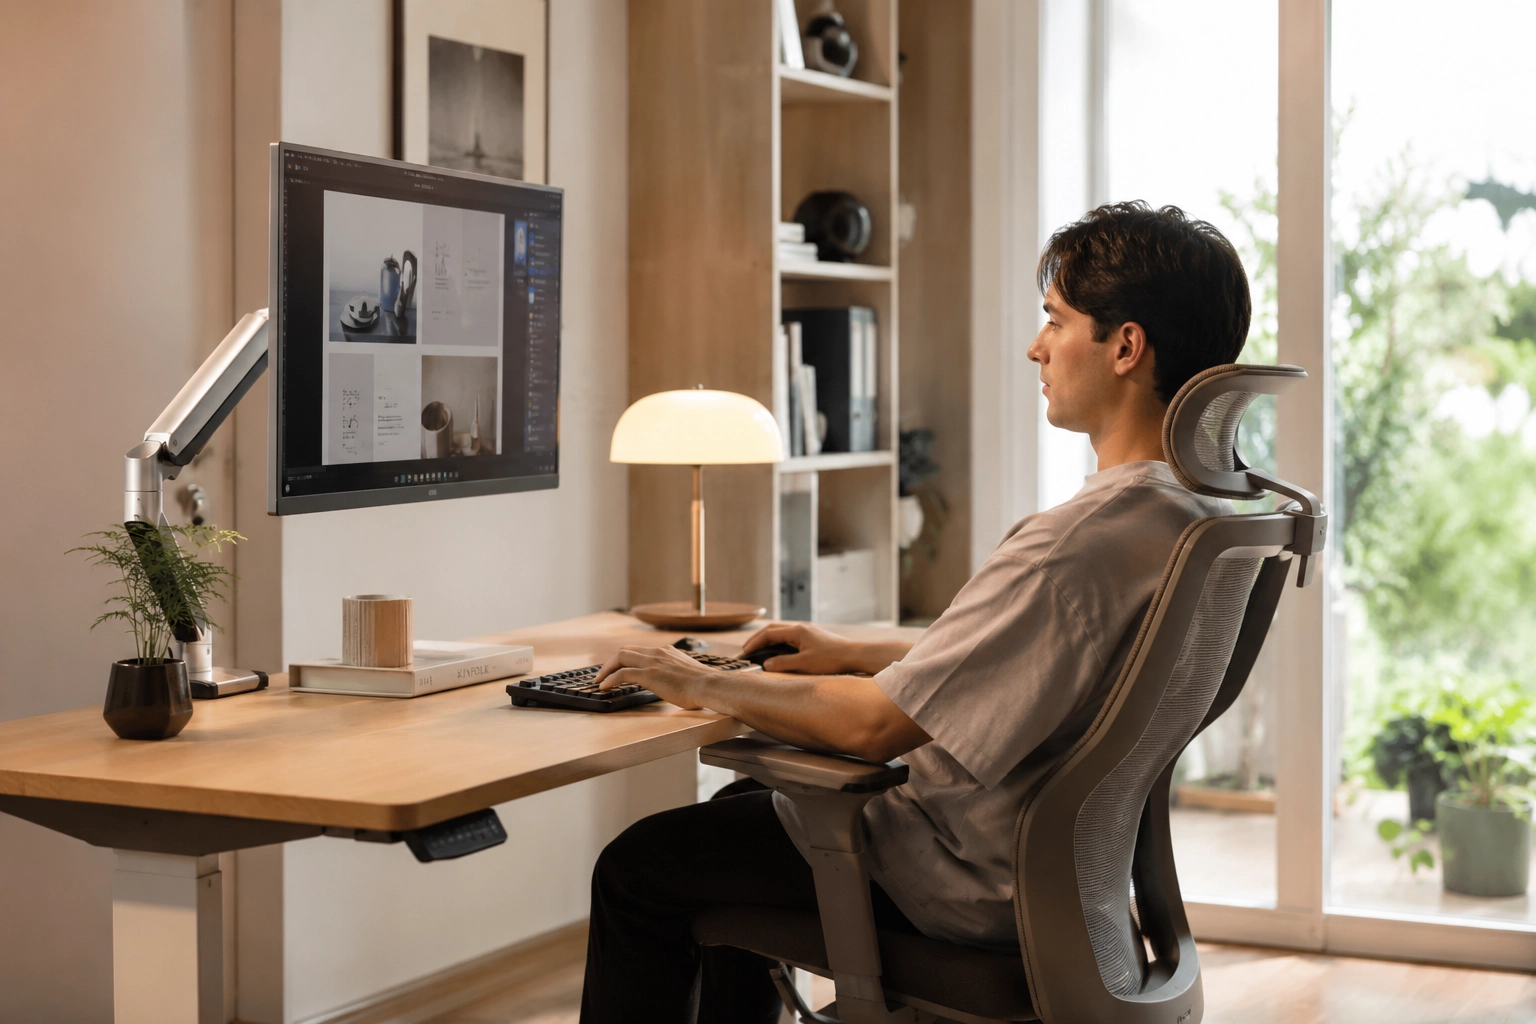 Weight Distribution: Relaxing the backrest to a 110-degree incline significantly lowers disc pressure. (Photo: ErgoSetupPro)
Step 4: Stop the “Text-Neck” Crane (Align Your Monitor)
If your computer screen is sitting too low, your neck will bend downward. Because the human muscular system is completely interconnected from head to toe via fascial lines, pulling your neck forward causes your lower back muscles to contract violently just to keep you upright. Raise your display using a dedicated monitor arm until the top third of the screen is at perfect eye level. This eliminates forward head posture and eases the load on your lower back.
Step 5: Execute the 50-Minute Hydration Reset
Spinal discs have no direct internal blood supply; they rely entirely on mechanical movement to absorb nutrients and fluids via a process called imbibition. Sitting completely static for 4 hours solid—no matter how expensive your ergonomic chair is—will cause disc starvation and pain. Set a recurring phone timer for 50 minutes. When it rings, stand up, stretch your hip flexors, and walk for exactly 2 minutes to rehydrate your joints.
Skeletal Biomechanics: Structural Impact
- Hips slid forward, flattening the lower back curve.
- Feet tucked tightly behind the knee joints under the pan.
- Leaning sideways into one armrest, distorting lateral alignment.
- Tailbone locked firmly flush against the rear frame.
- Backrest locked at a restful 110-degree recline angle.
- Weight balanced completely equal across both sit-bones.
Frequently Asked Questions (FAQ)
*Note: For maximum search authority, format this layout using your premium theme’s native Accordion Block tool to trigger Google FAQ rich results.*
Q: Should I use an external lumbar roll cushion to fix my lower back pain?
A: External cushions are temporary band-aids. While they can help prop up a broken-down, unsupportive chair, they easily slide out of position, forcing your pelvis forward and shortening your seat pan depth, which can create hamstring pressure over time.
Q: Will switching to a standing desk fix my lower back issues instantly?
A: Standing reduces disc pressure but introduces fatigue to your lower limbs and plantar fascia. The ideal scientific solution is a hybrid routine: stand for 20 minutes out of every hour, and utilize an adjustable ergonomic chair with proper pelvic anchoring for the remaining 40 minutes.