Honest Transparency: Buying your posture aids through my links earns this site a small affiliate commission from Amazon at zero extra cost to you. These structural guidelines are built on real-world workspace audits helping remote workers manage severe lumbar injuries.
If you are reading this right now, chances are you are actively dealing with a dull, throbbing, or burning ache across your lower lumbar spine. You dread having to sit down at your desk every morning because you know that within thirty minutes, that deep spinal compression will trigger muscle spasms, forcing you to constantly squirm, lean to one side, or hunch forward just to find a fleeting second of relief.
When you are managing an active injury—whether it is a bulging L4/L5 disc, severe muscle strains, or localized nerve pinches—the standard corporate advice to “just sit up straight” is actually dangerous. Forcing yourself into a rigid, military-style 90-degree posture using raw muscle power causes your deep spinal stabilizers to fatigue and spasm even faster. Learning how to sit with lower back pain requires utilizing skeletal leverage and correct equipment boundaries to unweight your lumbar discs naturally. Here is the exact four-step physical alignment framework I deploy during corporate posture audits to take the crushing weight off your spine instantly.
⚠️ The Active Injury Rule If your office chair features a sagging foam seat pan or an unyielding, flat backrest framework, your muscles will eventually lock up regardless of your posture. To stop ongoing structural aggravation, audit your core equipment tracks and explore our lab-tested solutions: The Best Ergonomic Office Chairs for Back Pain Relief.
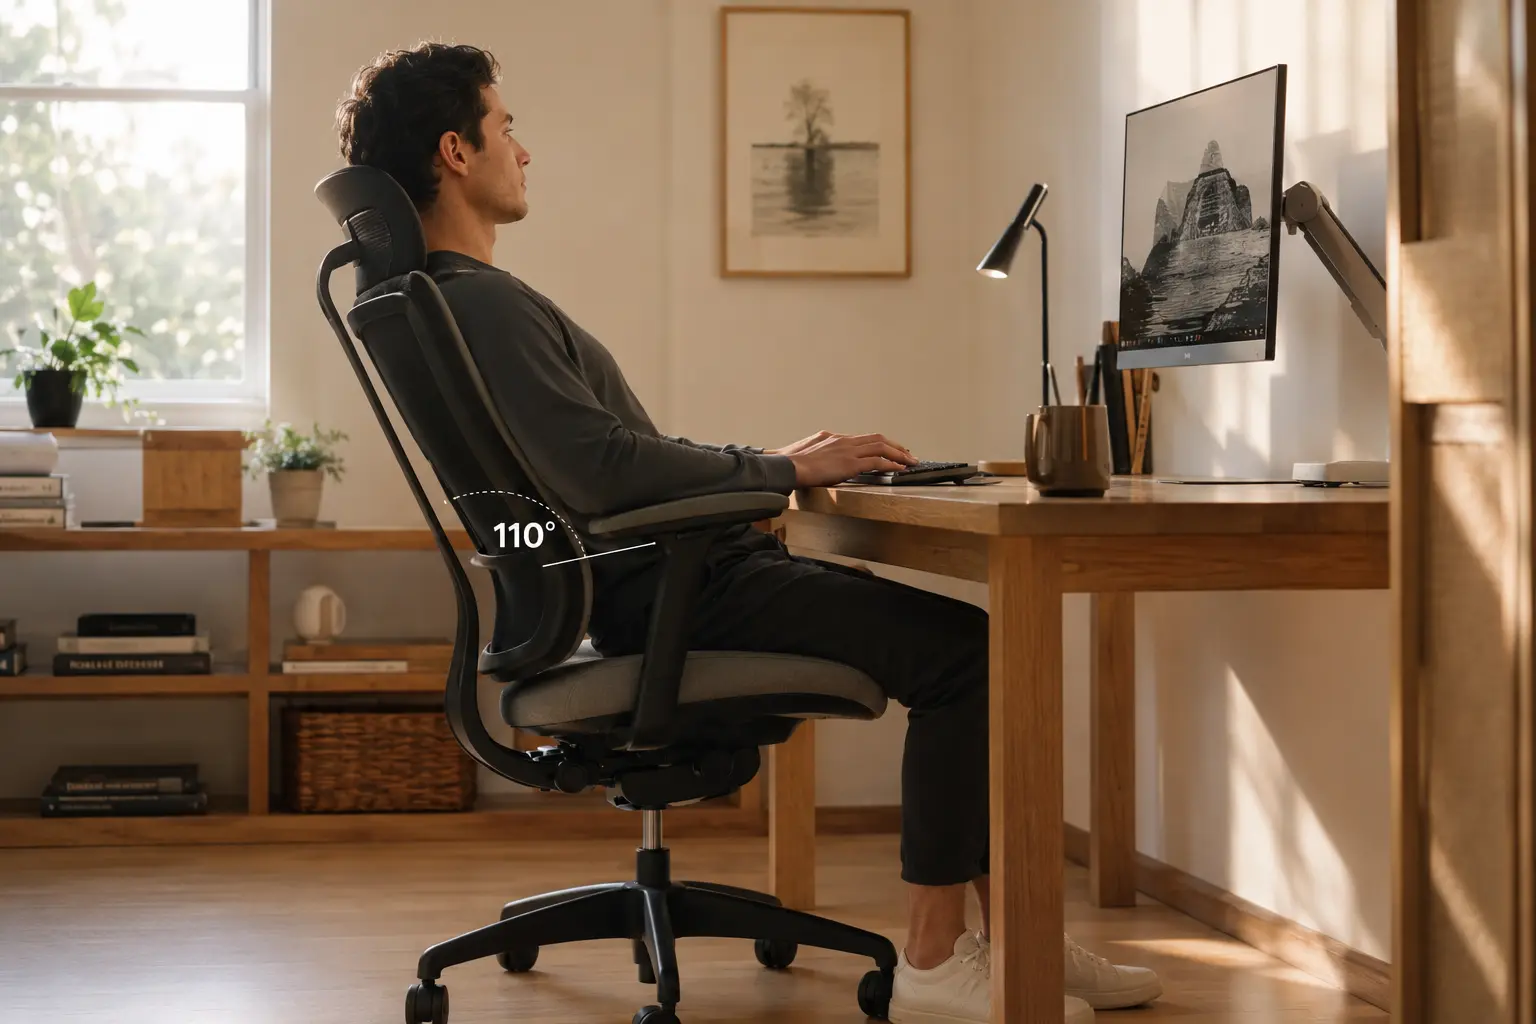 Sacral Bracing: Shifting into a slight recline opens up the hip joints, dropping intradiscal pressure significantly compared to a rigid 90-degree angle. (Photo: Arthur Pendelton)
1. Reset Your Pelvic Foundation (The Hips-First Lock)
Whenever someone sits down with an aching back, their natural instinct is to slide their hips forward to the middle of the seat cushion and lean their upper back against the frame. This looks relaxed, but it creates a destructive mechanical framework known as posterior pelvic tilt. This slouching positions your tailbone as the primary weight-bearing anchor, flattening your natural lordotic curve and forcing your spinal discs to endure a crushing load.
To establish safe sitting posture for lower back pain management, you must lock in an anterior pelvic tilt. Stand up completely, bend slightly at the waist, push your hips all the way back until your tailbone is flushed tightly against the rear backrest chassis, and then sit down upright. By anchoring your sit-bones securely at the back of the seat plate, you create an unyielding foundation that naturally keeps your lower curve arched without requiring constant muscle effort.
2. Enforce the 110-Degree Open Hip Angle
The standard office myth that you must sit at a strict, perfectly vertical 90-degree vertical angle is actively worsening your back issues. Laboratory disc pressure maps show that a 90-degree vertical position forces the psoas and hip flexor muscles to remain compressed, pulling directly on your lower vertebrae.
To safely settle into corrective ergonomic sitting positions, unlock your chair’s tilt mechanism and adjust the backrest backward into a gentle 105 to 110-degree open recline. Lean your torso back completely. Shifting your body weight back transfers a massive portion of your upper body mass straight into the chair’s backrest fabric or mesh instead of stacking it vertically down your sacral segments. This simple change drops internal disc load by up to 30% instantly, securing powerful sciatica relief at desk stations.
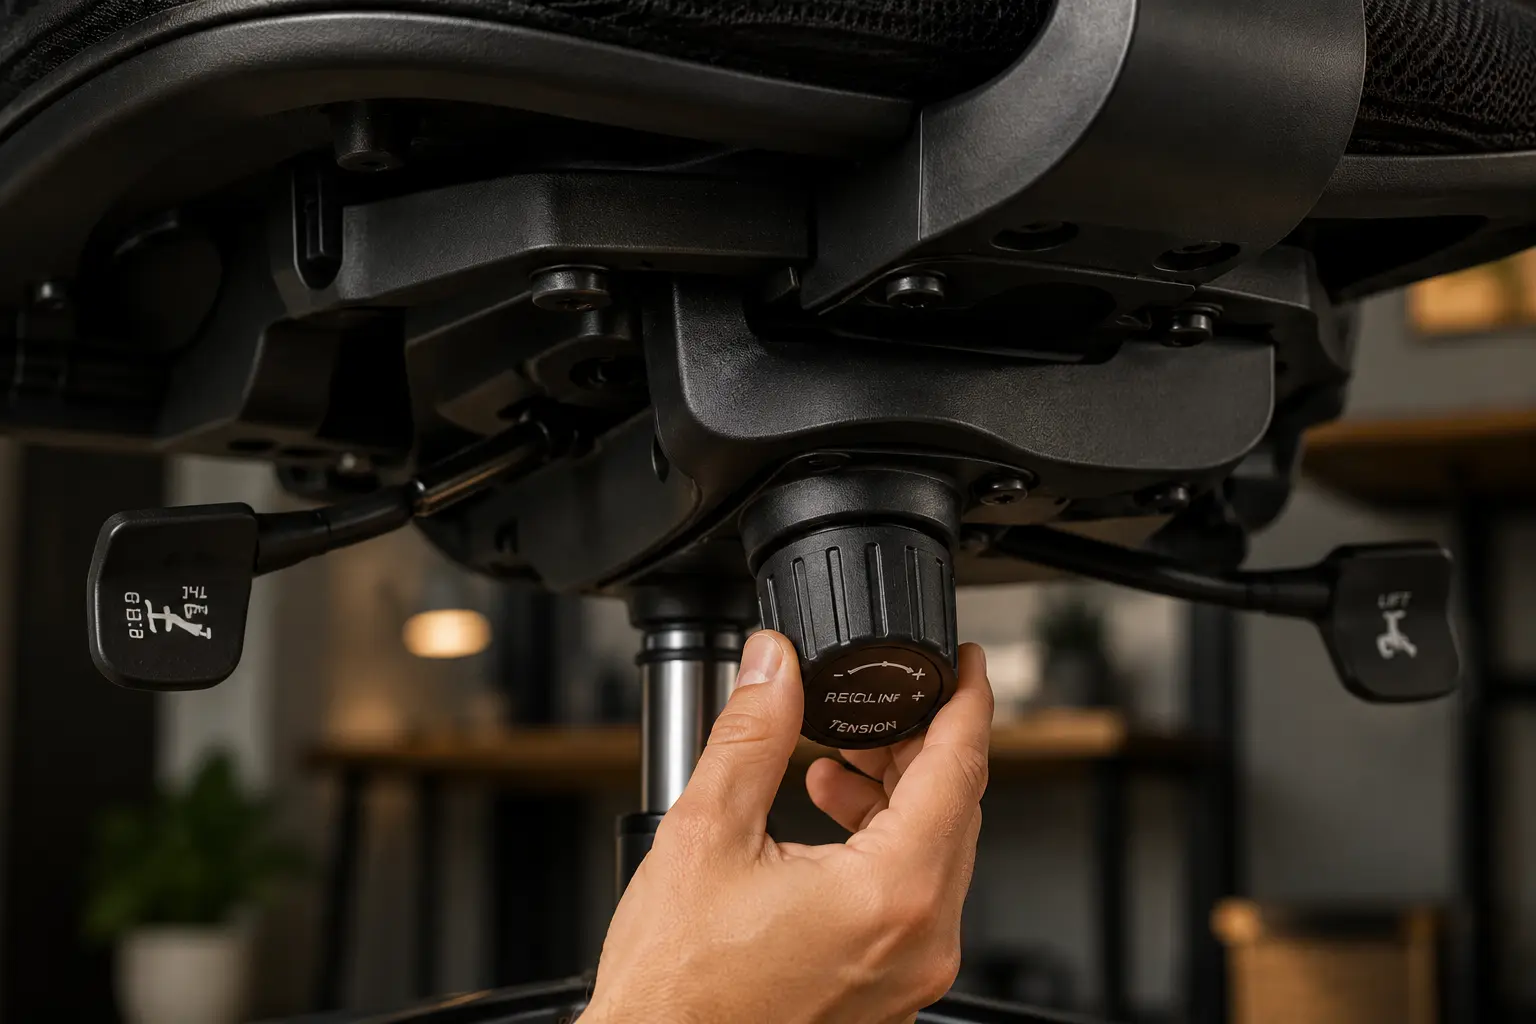 Tension Optimization: Adjusting your backrest recline resistance ensures the chair dynamic tracks your spinal movements safely. (Photo: Arthur Pendelton)
3. Eliminate Sacral Jarring (Ground Your Feet)
If you are a shorter user, or if you have to raise your office chair extra high to keep your arms level with a high desk, your heels will naturally hover or drift backward under the seat pan. The moment your feet lose grounding, your heavy thighs drop downward, pulling your pelvis out of alignment and causing intense muscle strain.
Your feet must be planted 100% flat on the floor to distribute lower body loads. If your heels hover even a fraction of an inch, deploy a dedicated high-density foam under-desk cushion or footrest immediately. Grounding your feet shifts the lower body load off your thighs and onto the floor, stabilizing your base structure and letting you prevent back pain while working long typing shifts.
4. Set the Armrest Support Horizon
Many remote workers ignore their armrests entirely or leave them set too low, letting their elbows hang unsupported. When your arms hang down, the weight of your entire shoulder girdle pulls forward, stretching your upper trapezius muscles and triggering a chain-reaction slouch that travels straight down your spine.
Adjust your chair’s 3D or 4D armrests upward until they sit flush with your desk surface. Your elbows should rest at a comfortable, relaxed 90-degree angle. This setup acts like a set of crutches—taking the heavy weight of your arms off your upper torso so your lower back stabilization tracks can rest and recover from chronic strain.
Posture Biomechanics: The Load Reality
- Hips slid forward away from the frame (Posterior tilt).
- Perfect 90-degree rigid angle causing psoas muscle tightness.
- Feet tucked behind knees, causing hamstring nerve strain.
- Tailbone locked firmly against the rear chassis (Anterior tilt).
- Open 110-degree recline transferring upper weight to the backrest.
- Feet flat and grounded to share lower pelvic weight loads.
Field Audit FAQ
Q: Should I use a specialized orthopedic seat pad to fix my lower back pain?
A: Yes, if your chair’s cushion has lost its density. A high-density wedge pad or elastic gel polymer grid helps elevate your pelvis, making it much easier to hold a healthy pelvic tilt. To select a stable, supportive option, explore our hands-on review guide:
The Best Ergonomic Seat Cushions for Office Chairs.
Q: Is switching to an active kneeling chair safe when dealing with an active injury?
A: Kneeling chairs work well for short, 30-minute posture resets because they open your hip angle beautifully. However, they lack a real backrest to lean against. Using them for full 8-hour shifts can overwork your core stabilizers, leading to deep muscle fatigue. Use them as an alternating tool alongside a proper task chair.