Honest Disclosure: If you buy your setup gear through my links, I earn a small affiliate commission from Amazon at zero extra cost to you. My field rules are built on thousands of physical corporate desk audits, not sponsored brand charts.
Every single week when I audit corporate office footprints or home studio spaces, I see the exact same physical disaster layout: an employee sitting in a highly expensive chair, leaning forward with their chin jutting out like a turtle, staring downward at a monitor resting flat on their desk surface. Within three hours, that employee is rubbing the back of their neck, suffering from a burning shoulder blade ache, and dealing with intense afternoon eye fatigue.
The core error isn’t their spinal strength—it is that their display frame is completely out of line with their body’s mechanical geometry. When your screen sits too low, your central nervous system instantly signals your neck muscles to flex forward to track the image. This triggers a destructive biomechanical strain known as “forward head posture.” For every single inch your head drops forward from your centerline vertical axis, you add roughly 10 pounds of extra physical weight load on your lower neck joints. Locking in the proper ergonomic computer monitor height is the single fastest way to break this loop. You don’t need academic medical gear to fix it; you just need to apply three basic optical boundaries to prevent back pain while working long typing shifts.
📐 Arthur’s Field Alignment Formula • The Horizontal Apex: The top 1 to 2 inches of your active screen glass should align directly with your horizontal eye level when sitting perfectly tall.
• The Arm’s Length Gap: Push the screen away until it sits exactly 20 to 30 inches (50-75 cm) from your eyes—roughly your full arm length extension.
• The Panoramic Tilt: Angle the screen glass backward by 10 to 20 degrees to match the natural radial arc of your eye rotation tracks.
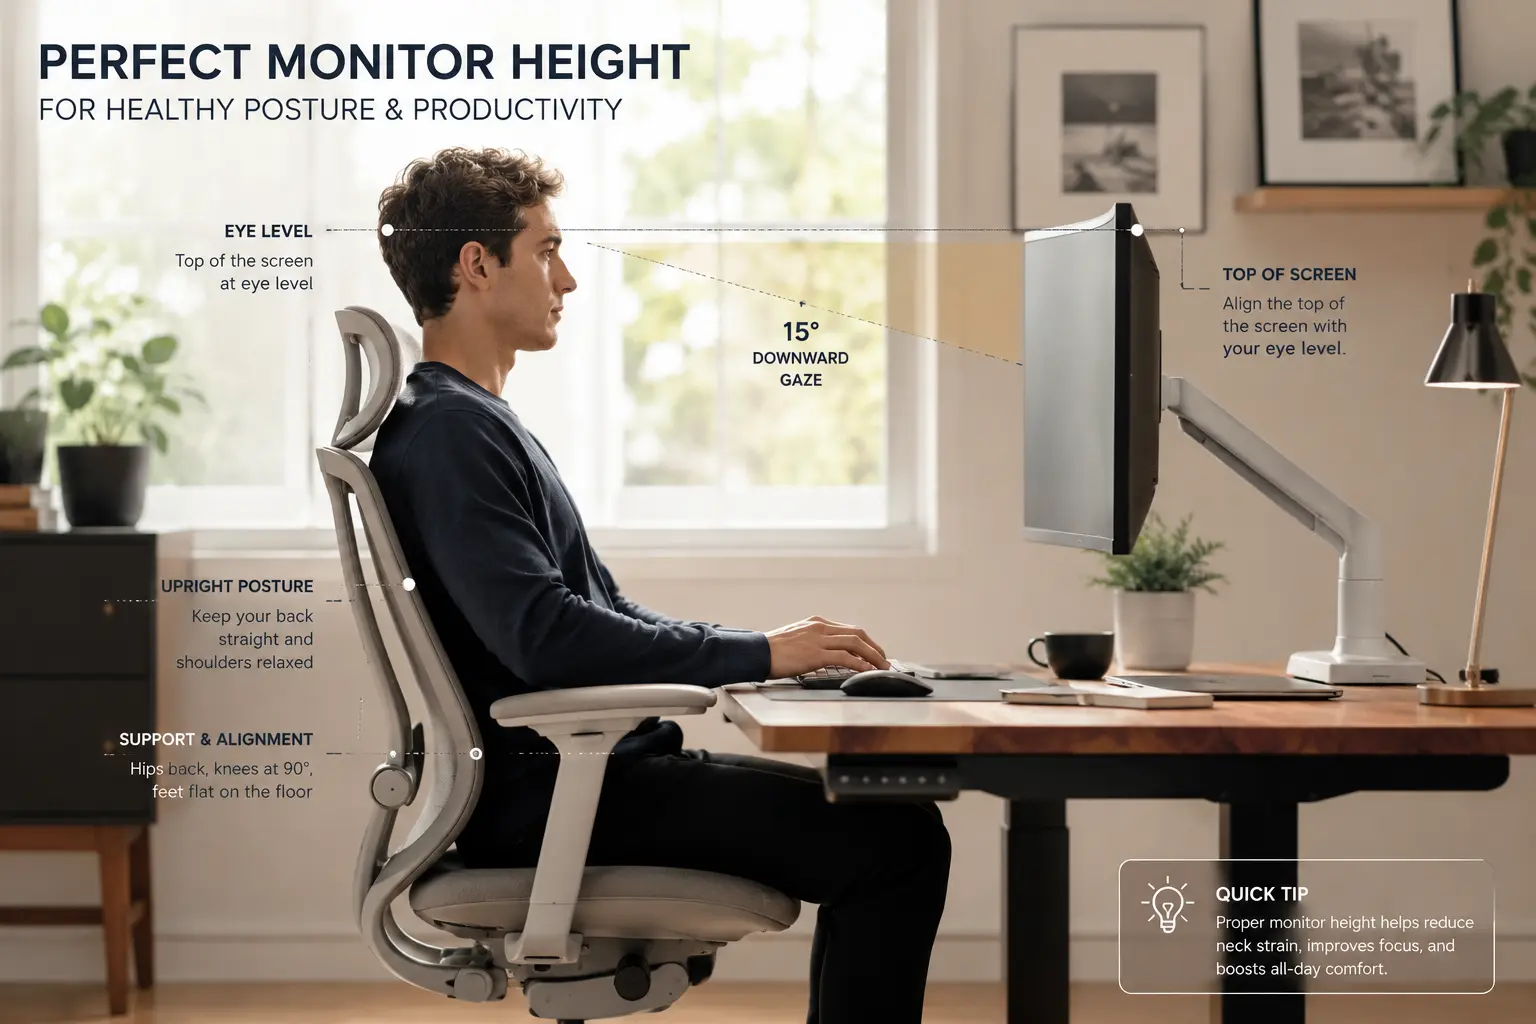 The Eye Line Apex: Positioning the monitor’s top border at your natural horizontal line of sight eliminates cervical muscle strain. (Photo: Arthur Pendelton)
Step 1: Set Your Seating Foundation First
You cannot set up a correct screen height if your seating height is constantly shifting. Before touching your monitor stand, slide your tailbone completely back into your seat pan. Ensure your backrest lumbar curve presses firmly against your lower beltline apex to maintain a healthy sitting posture for lower back pain deterrence.
Keep your feet completely flat on the floor or a solid footrest. Look straight ahead at the empty space above your desk—this is your natural horizontal line of sight. When your monitor is set up correctly, your eyes should look straight at the top bezel of the screen. This ensures that when you focus on the center of your code sheets or browser files, your eyeballs drop down naturally into a comfortable 15-degree viewing angle without your chin ever needing to drop forward.
Step 2: Balance the Depth and Backward Tilt
Screen distance is just as critical as height. If you place your monitor too far away, you will subconsciously pull your chest and neck forward to read fine typography, completely breaking your spine’s vertical alignment tracks.
Extend your hand straight out toward the screen. The display should sit right at your fingertips—roughly 20 to 30 inches away. If you use a massive 32-inch monitor or a panoramic ultrawide panel, push it back a few inches further to prevent eye strain. Finally, tilt the monitor backward slightly by 15 degrees. This subtle adjustment aligns the screen glass perfectly with the natural curve of your eyes, dropping glare levels and stopping glare flashes from giving you late-afternoon headaches.
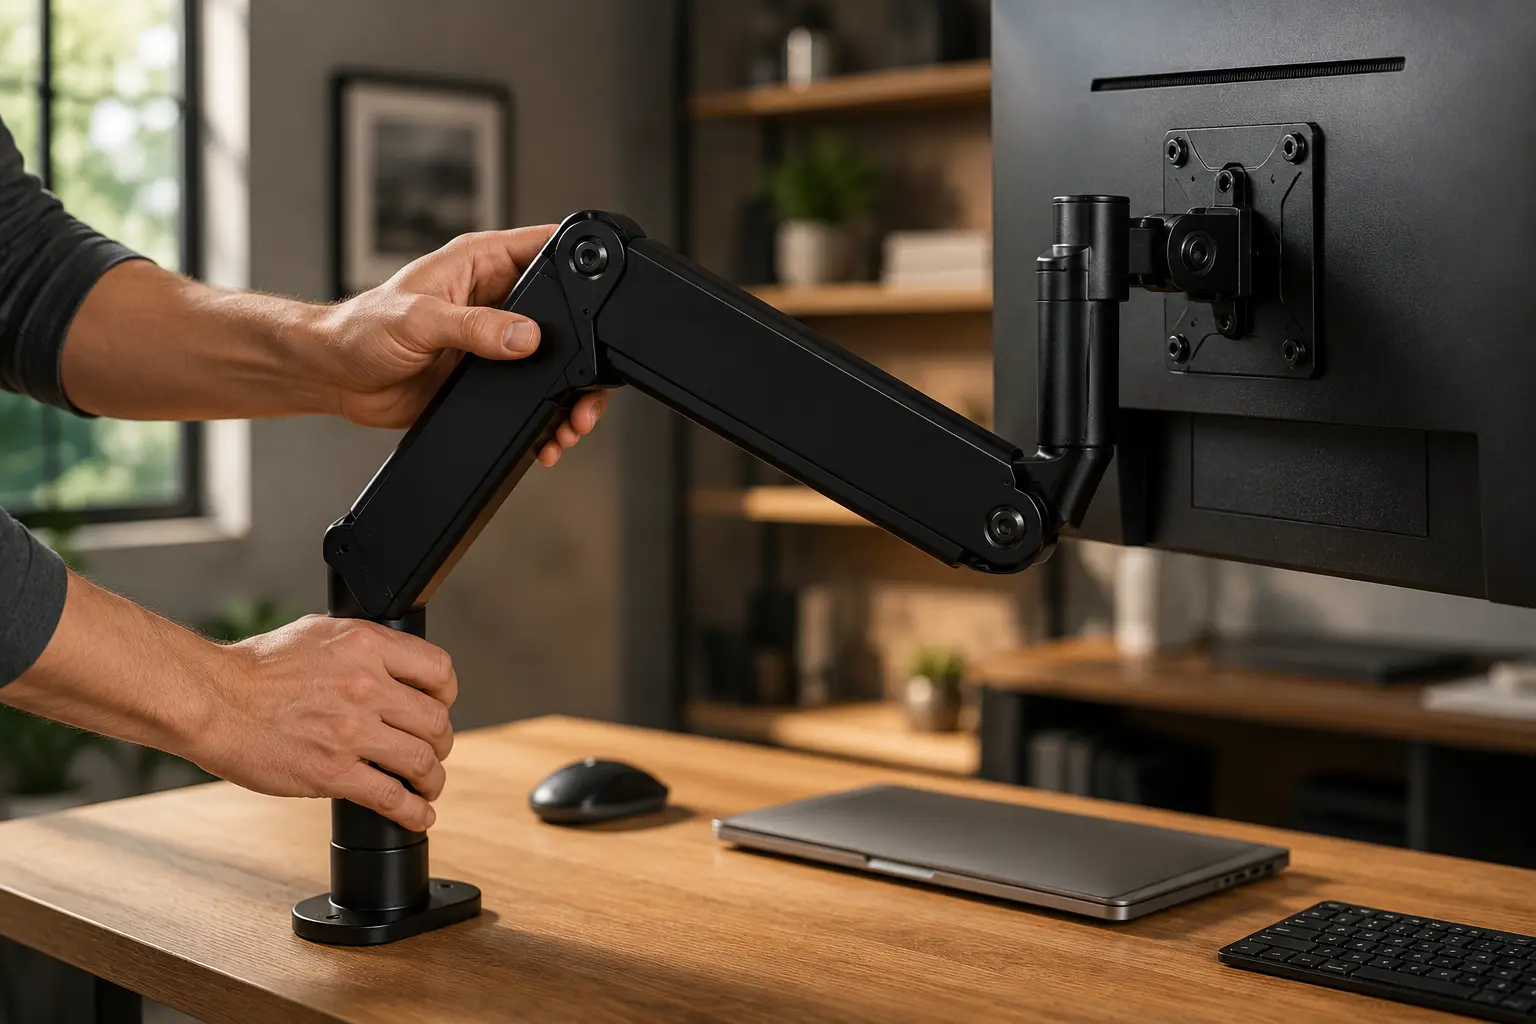 Dynamic Alignment: Using an adjustable arm allows you to quickly alter screen heights when transitioning on a best electric standing desk for home office. (Photo: Arthur Pendelton)
The Laptop Trap: Reclaiming Ergonomic Balance
The single worst hardware design for your neck health is an un-docked laptop sitting flat on a work surface. Because the keyboard and screen are built into one piece, you are forced into a terrible trade-off: you either drop the device low to type comfortably while destroying your neck, or lift it high to save your eyes while straining your wrists in mid-air.
To implement proper desk setup ergonomic tips on a laptop, you must separate the hardware. Elevate the entire laptop frame on a rigid aluminum stand until the top of the monitor meets your eye level. Then, plug an external mechanical keyboard and wireless mouse onto your desk mat below. This simple adjustment offloads your upper shoulder muscles instantly and locks your body into safe, stable ergonomic sitting positions all day long.
Hardware Choice: Wooden Shelves vs. Articulating Arms
- Perfect for simple setups with standard, fixed-base monitors.
- Adds premium wood style and clean under-desk shelf storage space.
- Drawback: Cannot adjust depth or height easily if you change sitting postures often.
- Essential for heavy curved screens or multi-monitor arrays.
- Allows you to instantly pull, push, or shift display lines with a gentle touch.
- Clears your entire desktop surface footprint for an ultra-clean workspace look.
Field Audit FAQ
Q: I wear progressive bifocal lenses. Do I still follow the standard top-of-screen eye-level rule?
A: No, progressive lenses are an exception. Because bifocal users read lower text blocks through the bottom section of their lenses, a high screen will force them to tilt their heads backward into a painful pinch. Lower your screen by an extra 2 to 3 inches below normal guidelines so you can track text comfortably without throwing your neck line out of alignment.
Q: Can an incorrect monitor height cause my daily afternoon headaches?
A: Absolutely. If you get a dull, band-like ache behind your eyes or around your forehead after three hours of computer work, you are likely suffering from suboccipital tension headaches caused by a forward slouch. Raising your monitor instantly removes that mechanical stress from the muscles at the base of your skull.